
How to add popups to your Framer website
A well-designed popup can be the difference between a visitor and a customer. Here is how to add a Pagecloud popup to your Framer website and set your goals in motion.
Updated May 3rd, 2024
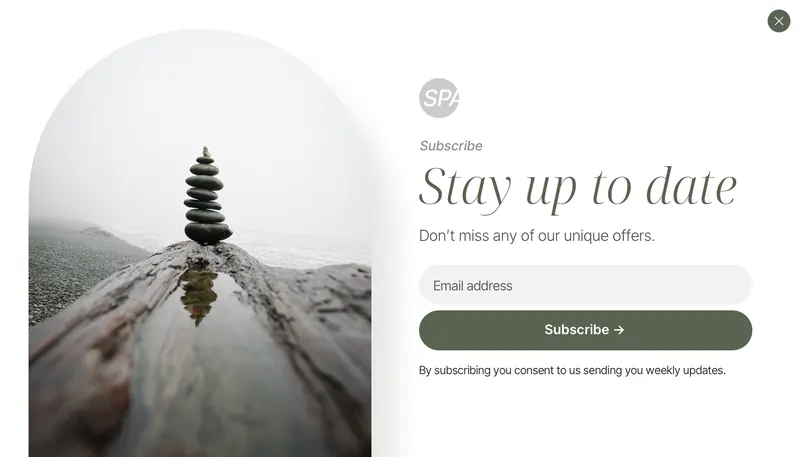
Get started with a popup strategy
Popups that deliver value, carry a call to action and use balanced design can engage visitors and get them to convert. Define your page goals and understand your audience first. Ask yourself:
- What value can I offer? Free services, discount codes and helpful content all count.
- What are my users looking for? Never let your popup interfere with what a visitor is trying to do on the page.
- What goals am I trying to reach? Building a list, getting visibility for a new product or service, or directing people to a channel: a popup or banner can lead them to that action.
Choose the right popup for your needs
Once you know what you want to achieve, pick the type of popup. Here are a few popular ones.
- Welcome popups A great way to deliver value when people first land on your page.
- Exit intents Set to trigger when a visitor is leaving, to keep them on your site longer and try to convert them before they go.
- Banners Sticky banners stay at the top of the page while people browse. They are less intrusive than a modal or full-screen popup.
Configure Pagecloud
To show a Pagecloud popup or banner on a site hosted elsewhere, you configure it in Pagecloud first, then add its code to Framer.
- Configure your domain name
- Define the pages you want the popup to display on
- Copy the embed code to use on your site
Add your domain name
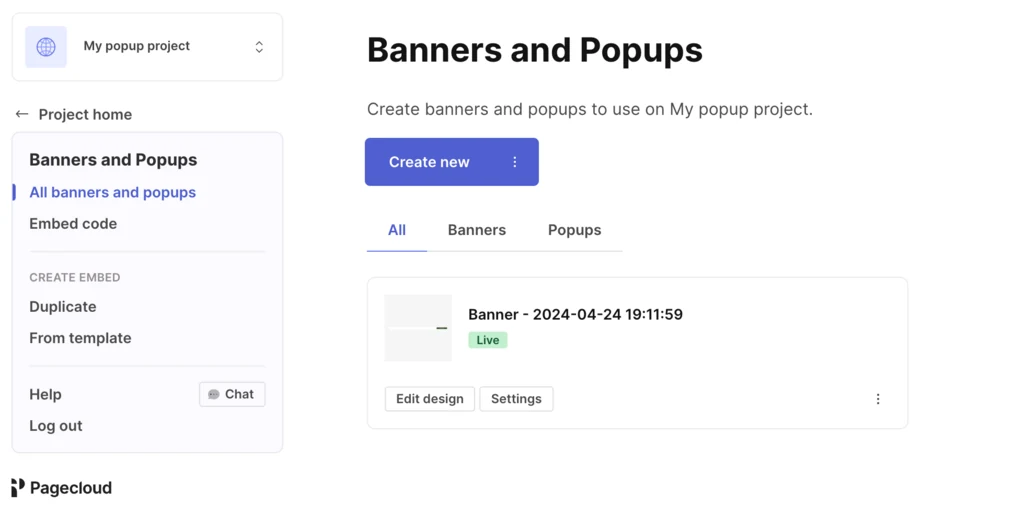
- Go to your Pagecloud dashboard.
- Select your project and click Banners and Popups in the left menu.
- Click Settings on your banner or popup.
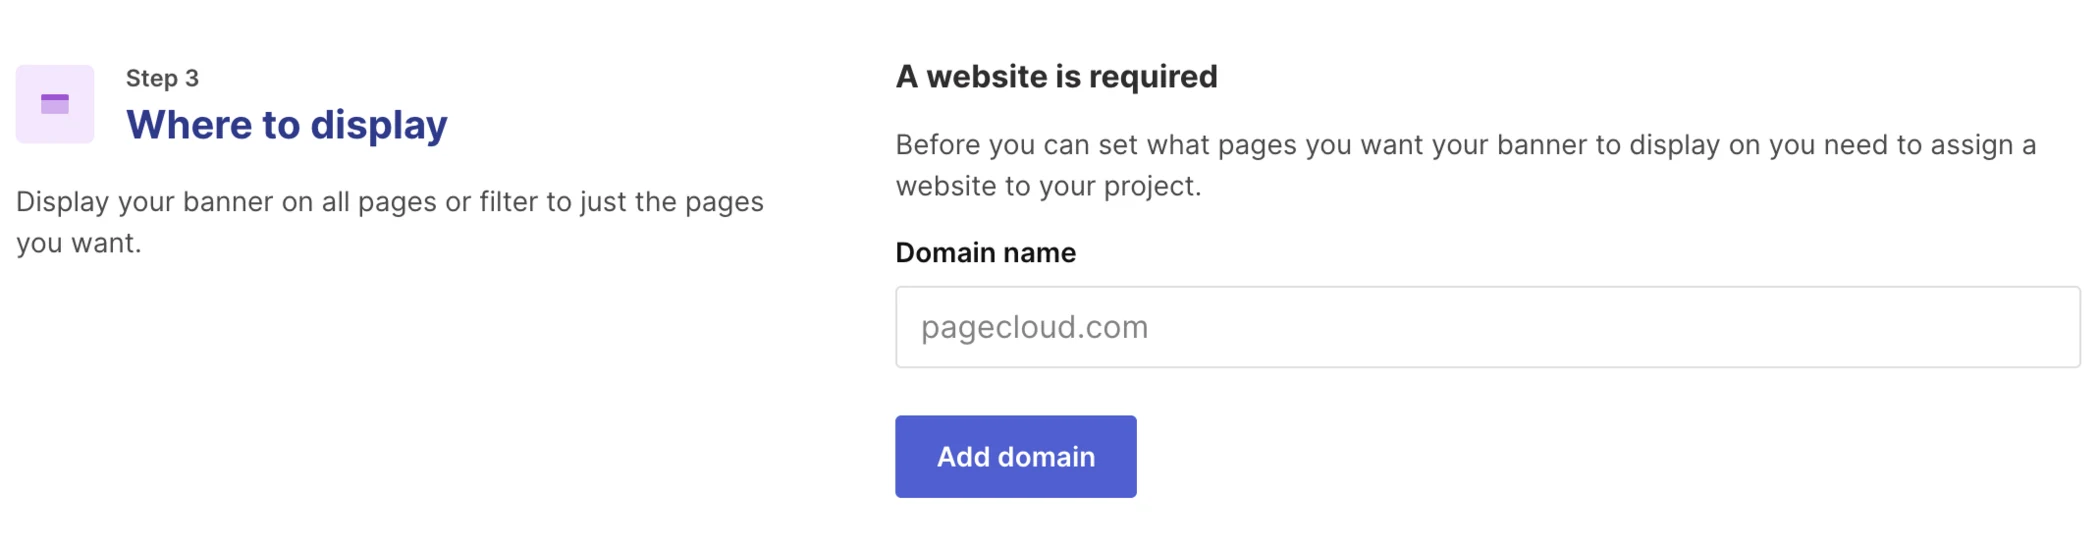
- In Setup, make sure you’ve connected your domain name in the Where to display section.
Select pages
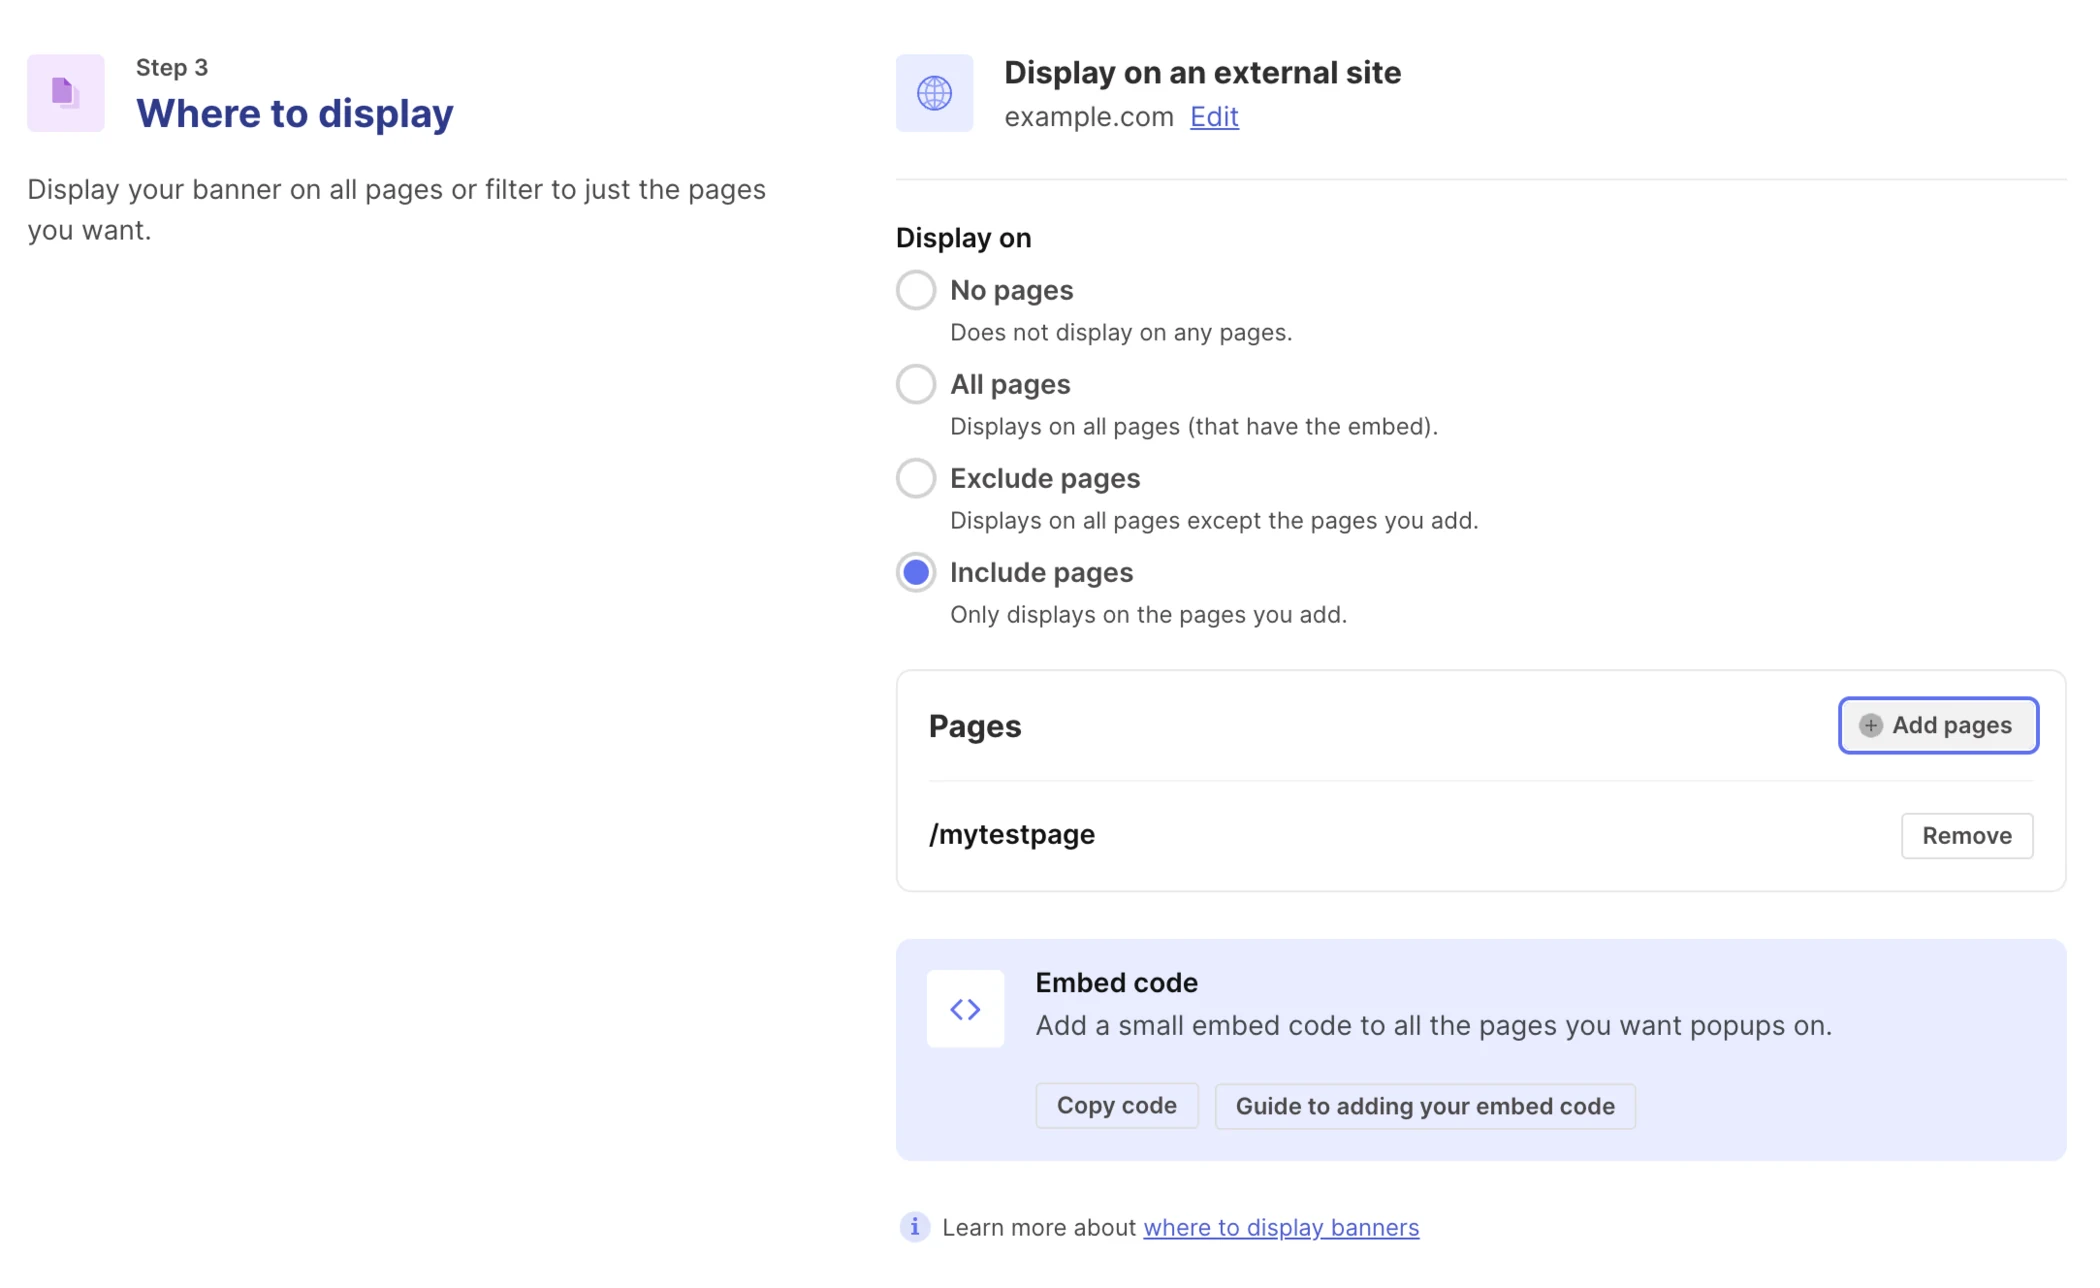
Once a domain is connected, choose the pages where the popup or embed displays: every page, or only some. We recommend Include pages, which lets you pick individual pages without making more updates to your website.
- Select Include pages.
- Click + Add pages.
- Add the name of your page.
You can also use wildcards in the form /mypage*,
which matches /mypage, /mypage2 and so
on.
Copy the embed code
Find your embed code in your Pagecloud dashboard, at the bottom of Setup or in the left toolbar.
Configure Framer
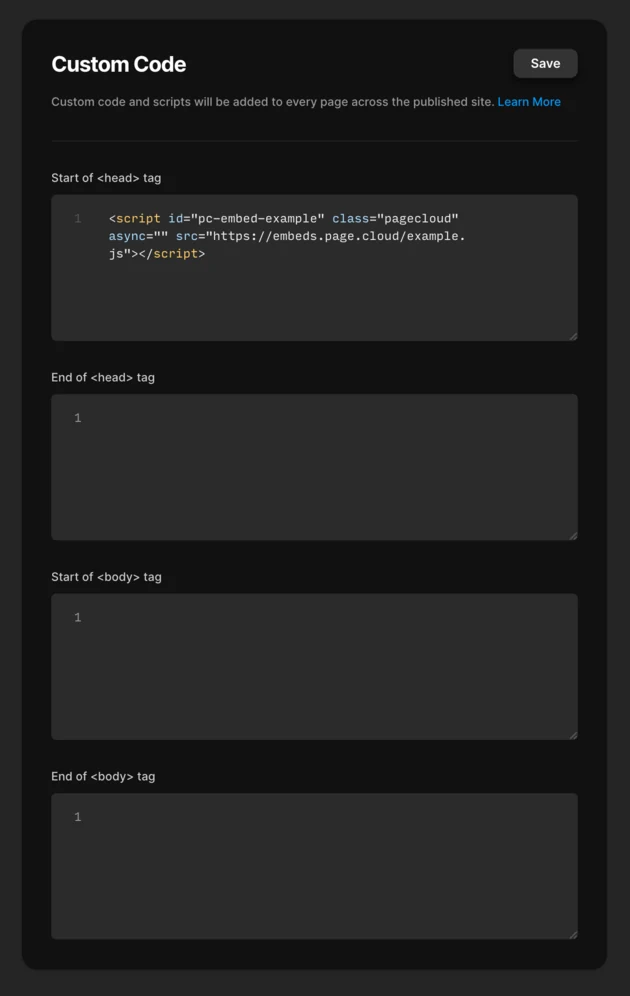
Framer gives you several options for adding an embed code. You can apply it to one page or to all pages. Adding it to all pages lets you manage where the popup shows from your Pagecloud dashboard, with no future changes in Framer if you want a popup on a different page. Use Framer’s custom code feature to add the embed code to every page in your project.
- From the Framer dashboard, click Settings, then General.
- Scroll down to the Custom Code section.
- Paste your popup embed code into any of the blocks.
- Save.
Don’t have a popup yet?
It’s easy to get started. No code required, easy to set up and we’re here to help along the way.
- Step 1 Choose a template Save time with a popup template that fits your needs. All templates are easy to customize.
- Step 2 Make it yours Set up how, when and where you want your popup to display, then customize the design to fit your brand.
- Step 3 Publish Publish your popup to your website, then watch your analytics and conversions roll in.
Frequently asked questions
How do I get started with Pagecloud Popups?
How do I build a Pagecloud popup?
How do I publish a Pagecloud popup?
Can I use Pagecloud Popups on an external website?
Do I have to change my Framer settings every time I change pages?
Your next popup is a template away.
Pick a design, make it yours and publish it from your Pagecloud account.